Published: May 19, 2010 by Noe Nieto
Lately I’ve been doing themes for Plone 4. I forget things, so these notes serve as documentation for some tricks I usally do for theming. There might be better ways to do some of them, so your comments are greatly appreciated. The audience is for anyone who has previous experience with buildout, Plone, Plone theming and related technologies like JavaScript, HTML, CSS and so on.
UPDATE: Part 2 is now available. This is the Part 1.
Setting up the environment.
I will use pastescript and buidlout on linux. On a clean install of Ubuntu Lucid Lynx, I did:
$ sudo aptitude install build-essential python-dev python-pip python-pastescript python-setuptools
$ sudo pip install zopeskel
Create the buildout
$ paster create -t plone3_buildout
Selected and implied templates:
  ZopeSkel#plone3_buildout  A buildout for Plone 3 installation

Enter project name: plone4b3
Variables:
  egg:      plone4b3
  package:  plone4b3
  project:  plone4b3

**************************************************************************
**   *** NOTE: You probably don't want to use this template!

**  Since Plone 3.1, the preferred way to get a buildout-based setup
**  for Plone is to use the standard installer for your operating
**  system (the Windows installer, the Mac installer, or the Unified
**  Installer for Linux/Unix/BSD). These give you a best-practice,
**  widely-used setup with an isolated Python and a well-documented
**  buildout. This template is here for older versions of Plone and
**  for experts who explicitly want a raw, non-installer-based
**  installation.

**  (This message is particularly aimed at people following out-of-
**  date books/documentation that suggest this is the right way to get
**  a Plone-based buildout. This is no longer the case.)
**************************************************************************

Expert Mode? (What question mode would you like? (easy/expert/all)?) ['easy']: easy
Plone Version (Plone version # to install) ['3.3.4']: 4.0b3
Zope2 Install Path (Path to Zope2 installation; leave blank to fetch one!) ['']:
Plone Products Directory (Path to Plone products; leave blank to fetch [Plone 3.0/3.1 only]) ['']:
Initial Zope Username (Username for Zope root admin user) ['admin']:
Initial User Password (Password for Zope root admin user) ['']: secret
HTTP Port (Port that Zope will use for serving HTTP) ['8080']:
Debug Mode (Should debug mode be "on" or "off"?) ['off']:
Verbose Security? (Should verbose security be "on" or "off"?) ['off']:
Creating template plone3_buildout
Creating directory ./plone4b3
  Copying README.txt to ./plone4b3/README.txt
  Copying bootstrap.py to ./plone4b3/bootstrap.py
  Copying buildout.cfg_tmpl to ./plone4b3/buildout.cfg
  Recursing into products
    Creating ./plone4b3/products/
    Copying README.txt to ./plone4b3/products/README.txt
  Recursing into src
    Creating ./plone4b3/src/
    Copying README.txt to ./plone4b3/src/README.txt
  Recursing into var
    Creating ./plone4b3/var/
    Copying README.txt to ./plone4b3/var/README.txt

**************************************************************************
**   Generation finished.

**  You probably want to run python bootstrap.py and then edit
**  buildout.cfg before running bin/buildout -v".

**  See README.txt for details.
**************************************************************************

And finally, let's run bootstrap and buildout to download Plone3.

tzicatl@tzicatl-lynx:~/plone4b3$ python bootstrap.py
Creating directory '/home/tzicatl/plone4b3/bin'.
Creating directory '/home/tzicatl/plone4b3/parts'.
Creating directory '/home/tzicatl/plone4b3/eggs'.
Creating directory '/home/tzicatl/plone4b3/develop-eggs'.
Generated script '/home/tzicatl/plone4b3/bin/buildout'.
tzicatl@tzicatl-lynx:~/plone4b3$ bin/buildout
.....
$
Create theme product and add it to the buildout
Now, let’s create the theme. We are going to base our design on this template from FreeCSSTemplates.org:
$ cd plone4b3/src

$ paster create -t plone3_theme
Selected and implied templates:
  ZopeSkel#basic_namespace  A basic Python project with a namespace package
  ZopeSkel#plone            A project for Plone products
  ZopeSkel#plone3_theme     A theme for Plone 3

Enter project name: plonetheme.hanging
Variables:
  egg:      plonetheme.hanging
  package:  plonethemehanging
  project:  plonetheme.hanging
Expert Mode? (What question mode would you like? (easy/expert/all)?) ['easy']: easy
Skin Name (Name of the theme (human facing, added to portal_skins)) ['']: FreeCSSTemplates.org Hanging
Empty Styles? (Override default public stylesheets with empty ones?) [False]:
Include Documentation? (Include in-line documentation in generated code?) [True]: False
Version (Version number for project) ['1.0']:
Description (One-line description of the project) ['An installable theme for Plone 3']: An Installable theme for Plone 4
Creating template basic_namespace
Creating directory ./plonetheme.hanging

....
Now it’s time to modify buildout.cfg in order to add the new created theme
product. So it’s also time to do some extra modifications, these include:
- Remove all coments
- Move eggs and zml declarations from [instance] section to [buildout] section
- Add PIL and plonetheme.hanging to the eggs section
- Add ZCML slug for plonetheme.hanging
Fine tune the theme package
Before running buildout, we are going to “fine tune” the theme package.
Lets start with src/plonetheme.hanging/setup.py
- Add author and author e-mail
- Change url from http://svn.plone.org/svn/collective/ to http://github.com/tzicatl/plone4andtheme
- Change license from “GPL” to “Creative Commons Attribution 3.0 Unported” (I’m not a lawyer so i don’t know if i’m doing it right)
- Modify
READMEto include credits and description. - Rename
docs/LICENSE.GPLtoLICENSE.CCand paste the CC license contents. - Edit
src/plonetheme.hanging/plonetheme/hanging/configure.zcmland delete the line<i18n:registerTranslations directory="locales" />. This is because we are not doing locales on this theme, but we can. - I don’t like the long names that paster creates for the folders inside skins directory. So usually change them to something shorter. In order to do that:
- Rename the directory, for example: rename from
plonetheme_hanging_custom_imagestohangingtheme_images. - Change the corresponding name in
skins.zcmlandprofiles/default/skins.xml(working fromsrc/plonetheme.hanging/plonetheme/hanging). - Note 1: Using your editor’s “Search & Replace” is a good idea.
- Note 2: You can add another extra skin layers by adding directories and editing the two above files.
- Rename the directory, for example: rename from
- Change the base theme from “Plone Default” to “Sunburst Theme” by editing
profiles/default/skins.xml.- Open the file and look for this line: “
<skin-path name="FreeCSSTemplates.org Hanging" based-on="Plone Default">” - Change the based-on parameter from “Plone Default” to “Sunburst Theme”
- This step is important in order to get all the new plone4 look & feel and change it to suit our needs.
- Open the file and look for this line: “
Now, we are ready to run the buildout process.
First, run bootstrap.py if you haven’t already done so
$ python bootstrap.py
The buildout process will thake some minutes depending on the speed of your computer and mainly your network bandwidth.
$bin/buildout
You might see some warnings but you should not see any error.
Start plone instance
If the buildout process was sucessful, now you will be able to start your plone instance in foreground mode
tzicatl@tzicatl-lynx:~/plone4b3$ bin/instance fg
2010-05-19 18:02:43 INFO ZServer HTTP server started at Wed May 19 18:02:43 2010
    Hostname: 0.0.0.0
    Port: 8080
2010-05-19 18:02:53 WARNING ZODB.FileStorage Ignoring index for /home/tzicatl/plone4b3/var/filestorage/Data.fs
2010-05-19 18:02:53 WARNING ZODB.blob (10127) Blob dir /home/tzicatl/plone4b3/var/blobstorage/ has insecure mode setting
2010-05-19 18:03:12 INFO Zope Ready to handle requests
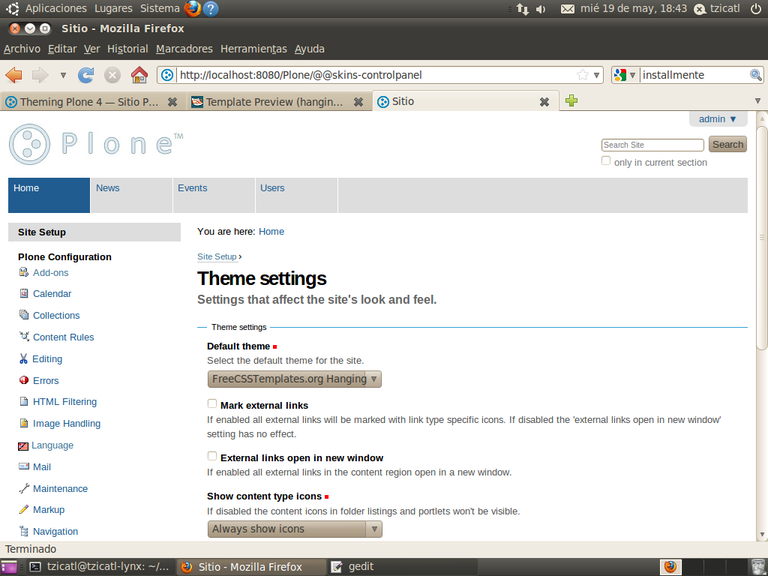
Create a site and install the newly created theme. You should see a site equal to plone4’s SunBurst Theme
Wrap up
On this installment we learned (or I hope so) to prepare our system for buildout and Zope, we learned to create a Plone 4 instance from scratch and also learned to create and prepare a plone product for the new theme we are going to make.
That’s all for now. Wait for the Part 2.